This guide explains the steps to set up and use an Elementor Template Kit on your WordPress website. Note that this is not a full WordPress theme but a collection of pre-built templates designed to work seamlessly with the Elementor Page Builder plugin.
Prerequisites
Before using an Elementor Template Kit, ensure the following:
- WordPress is installed and running.
- You have installed and activated both Elementor and Elementor Pro on your WordPress site.
- The Hello Elementor theme is activated (recommended for best compatibility).
Step-by-Step Instructions
1. Install Elementor and Elementor Pro
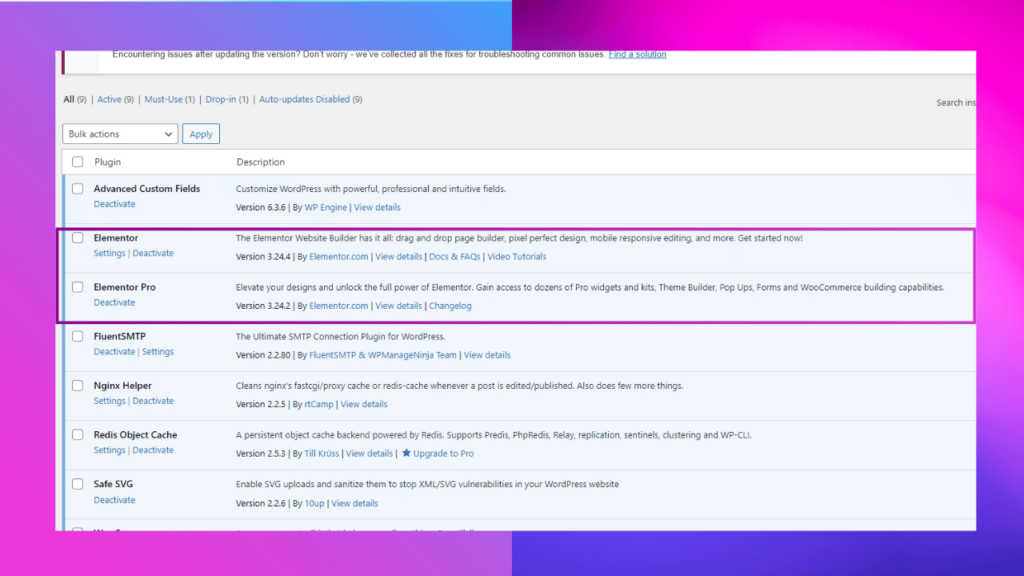
- Go to your WordPress dashboard.
- Navigate to Plugins > Add New.
- Search for Elementor and Elementor Pro, then install and activate both.
2. Navigate to Elementor Tools
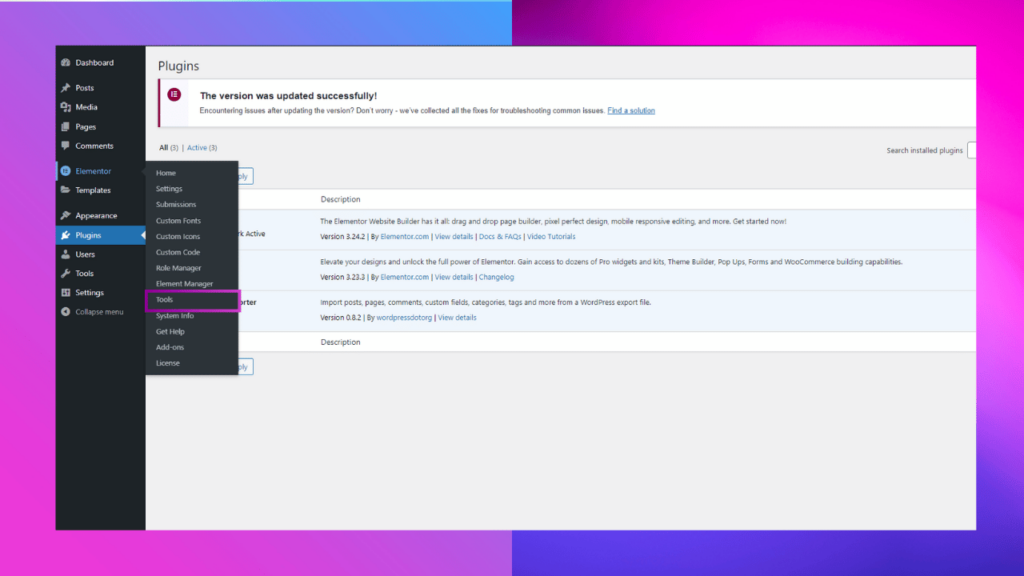
- On the WordPress dashboard, go to Elementor > Tools > Import/Export Kit in the sidebar.
- This is the section for importing and managing Elementor Template Kits.
3. Click Import
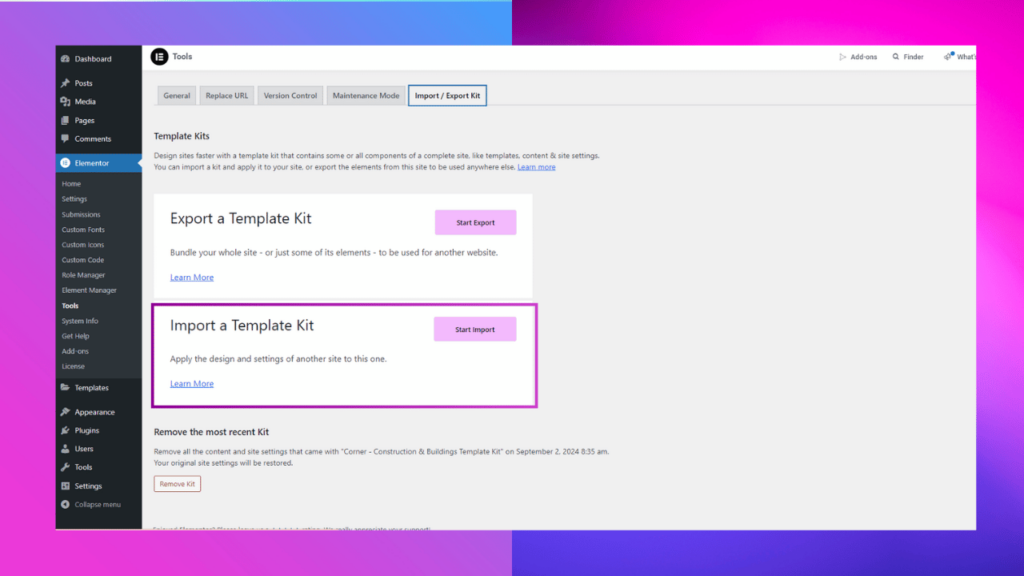
- On the Import/Export Kit page, click the Import button.
- A dialog box will appear asking you to upload the Template Kit file.
4. Select Your Template Kit File
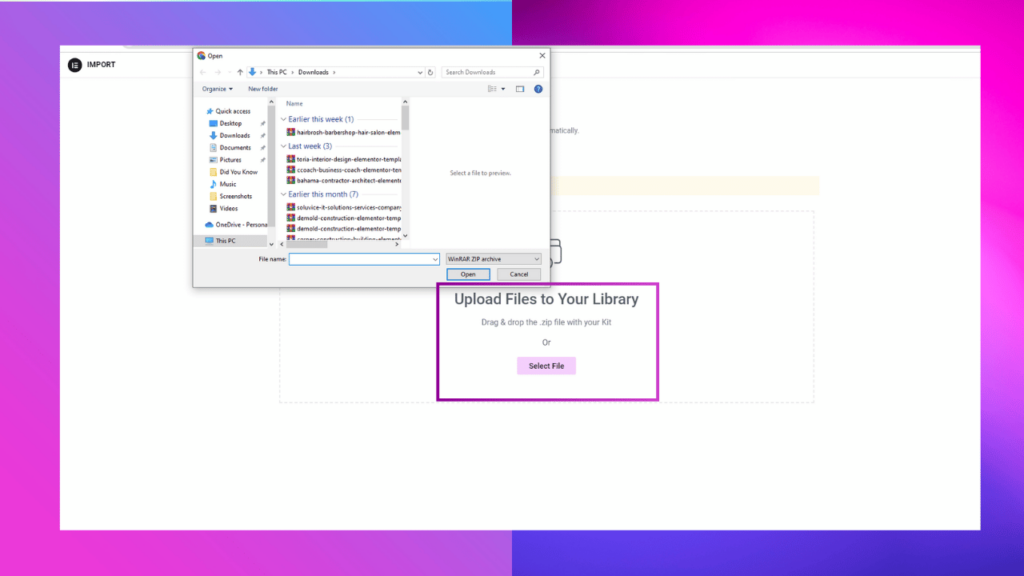
- Choose the Template Kit file in either JSON or ZIP format from your computer.
- Click Next to proceed.
5. Handle Security Warning
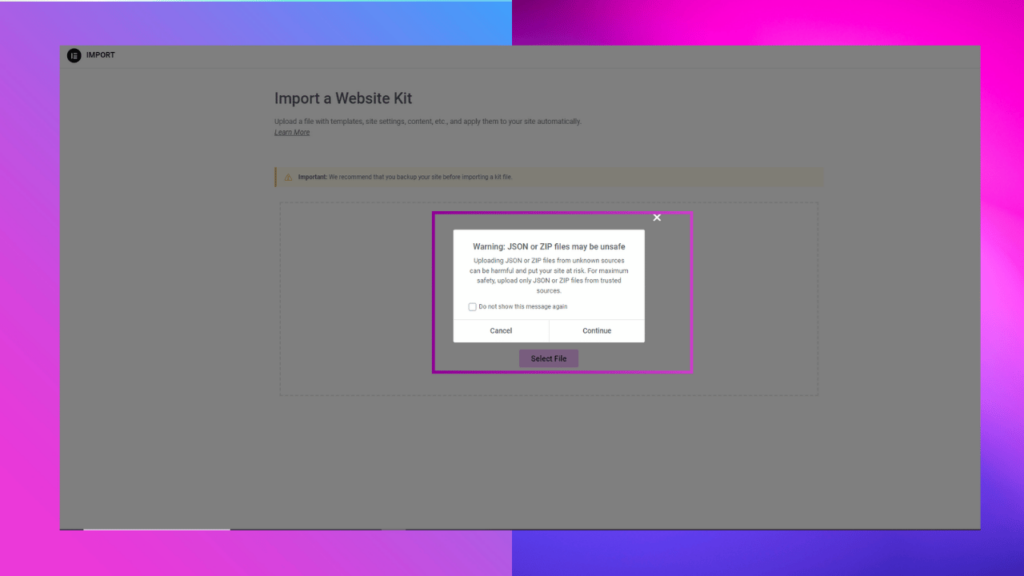
- You might encounter a warning stating, “Warning: JSON or ZIP files may be unsafe.”
- Simply click Continue to proceed with the installation.
6. Enable Unfiltered File Uploads
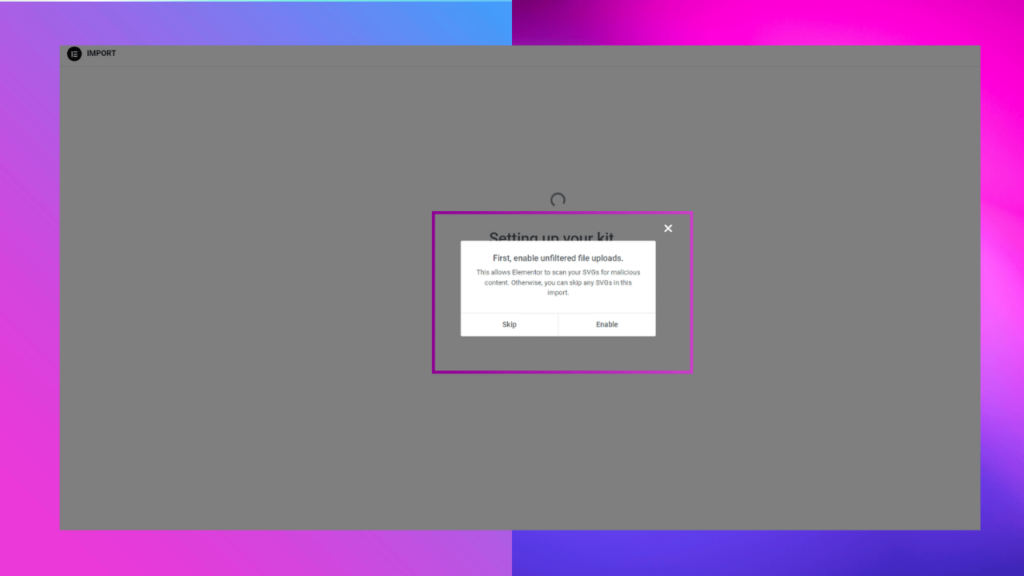
- If prompted, enable unfiltered file uploads by clicking the Enable button.
- This allows the Template Kit to upload without restrictions.
7. Select Plugins to Import
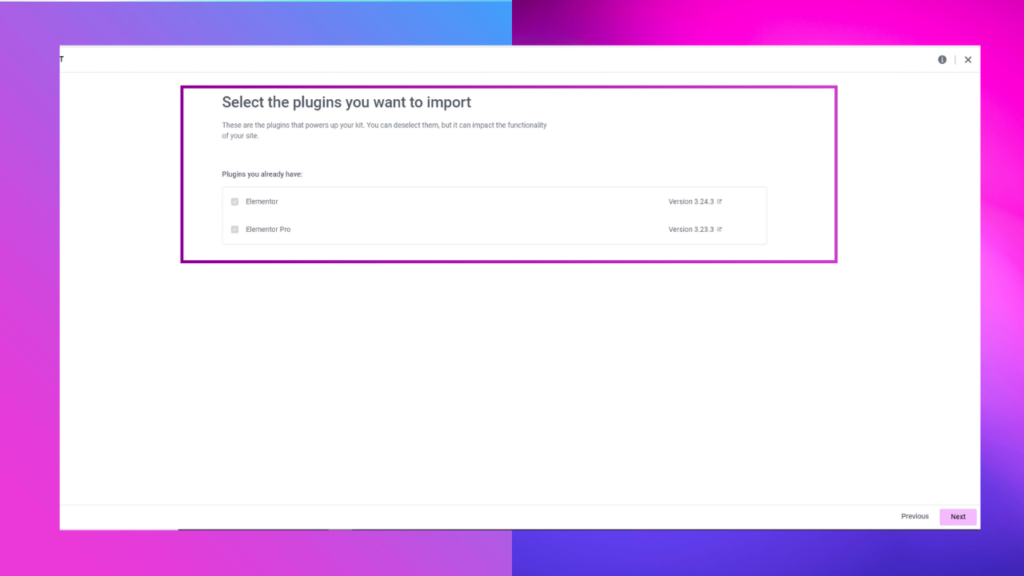
- The system will now show a list of required plugins for the template kit.
- Check the plugins you want to install, then click Next.
8. Select Parts to Apply
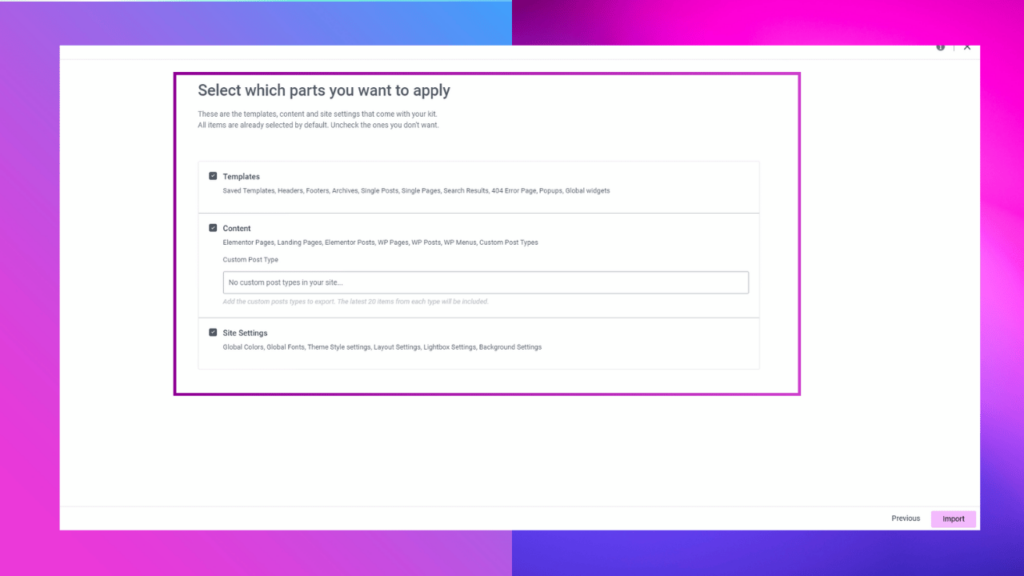
- You will be given the option to select which parts of the Template Kit to apply to your site (e.g., headers, footers, pages).
- Ensure all necessary parts are selected by default, then click Import.
9. Wait for the Kit Setup
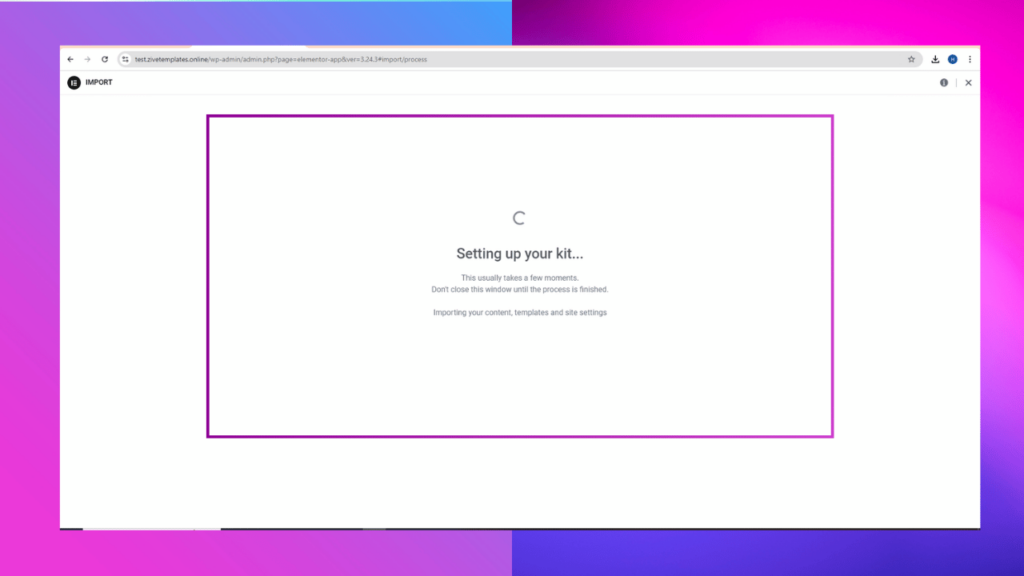
- After clicking Import, a loading screen with “Setting up your kit” will appear.
- Wait a few minutes for the process to complete.
10. Kit Installation Complete
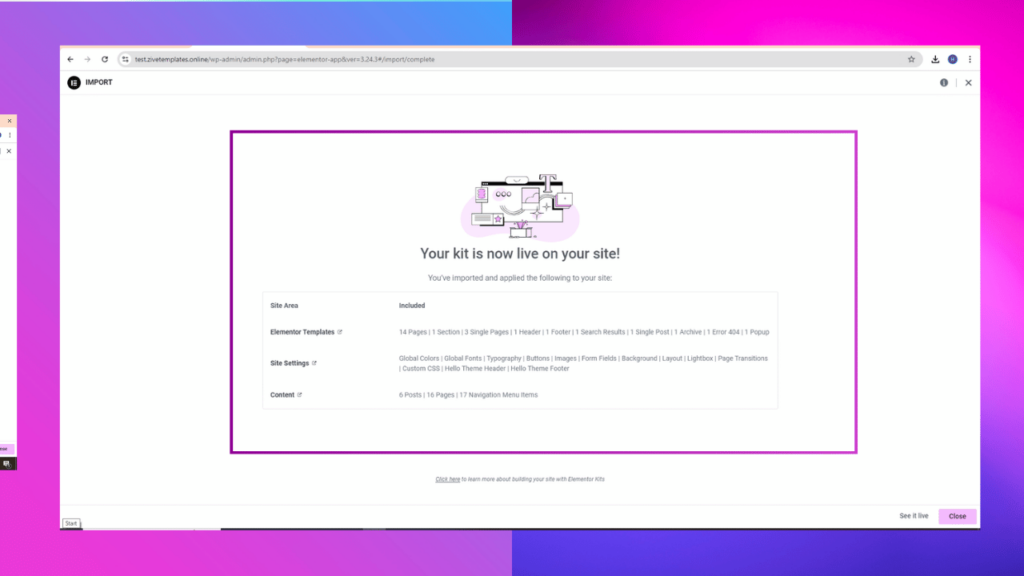
- Once installation is finished, you will see a confirmation message stating, Your kit is now live on your site!
- Click the See It Live button to preview your site with the newly applied template kit.
Conclusion
You’ve successfully installed and applied the Elementor Template Kit to your website. If you have any questions or need further assistance, please visit our Support Center for help.
Additional Tips
- Make sure to check the responsiveness of your site after applying the kit, as all templates are fully mobile-friendly.
- Customize any sections or pages as needed using the Elementor page builder.
How to Customize an Elementor Template Kit
Introduction
After successfully installing an Elementor Template Kit on your WordPress site, you may want to personalize it to match your brand or design preferences. This guide provides a step-by-step process for customizing the templates using the Elementor Page Builder without needing to write any code.
Customizing Your Template Kit
1. Edit with Elementor
- Go to your WordPress dashboard and navigate to Pages.
- Find the page you want to customize and click Edit with Elementor.
- This will open the Elementor editor, where you can visually customize your page using drag-and-drop functionality.
2. Customize Global Styles
Elementor Template Kits come with Global Kit Styles, allowing you to adjust fonts, colors, and other design elements across the entire site in one place.
- In the Elementor editor, click on the top-left Site Settings icon (gear icon).
- Navigate to Global Colors and Global Fonts to set your preferred color schemes and typography.
- Any changes made here will automatically apply site-wide, ensuring a consistent design.
3. Edit Section Content
Each page is made up of individual sections (blocks), which are fully customizable.
- Hover over any section you want to modify.
- Click the Edit Section icon (six dots) to adjust settings such as layout, background color, images, and padding.
- You can also edit individual elements like text or images by clicking directly on them and changing the content in the left sidebar.
4. Replace Images and Videos
To replace images or videos:
- Click on the image or video you wish to change.
- In the left panel, click Choose Image or Choose Video.
- Upload a new file from your computer or select one from the Media Library.
- Adjust the Image Size, Alignment, and other settings as needed.
5. Update Text
Changing text content is simple:
- Click on the text block you want to edit.
- In the left sidebar, update the text under Content.
- Use the Style tab to adjust font size, color, alignment, and more.
6. Customize Buttons and Links
Buttons and links can be edited by:
- Clicking on the button or link.
- In the left panel, update the Button Text and Link URL under the Content tab.
- Adjust styling such as button color, border, and hover effects under the Style tab.
7. Rearrange Sections and Widgets
To move sections or widgets:
- Click and drag the section (or widget) you want to relocate.
- Drop it in the desired position on the page.
8. Add New Widgets or Sections
You can add additional elements by dragging widgets from the Elementor sidebar.
- Click the Add Section button to create a new section.
- Choose a layout for your section (e.g., single column, two columns).
- Drag and drop widgets (e.g., text, image, video) into the section from the left panel.
9. Customize Header and Footer (Elementor Pro Required)
If your kit includes custom headers and footers, you can edit them through Elementor’s Theme Builder.
- Go to Templates > Theme Builder in your WordPress dashboard.
- Select the Header or Footer template.
- Click Edit with Elementor to make customizations like adding a logo, changing navigation links, or modifying the design.
10. Save Your Changes
Once you’re done with your customizations, click the Update button in the Elementor editor to save your changes.
11. Preview Changes
Before publishing, it’s good to preview your site.
- Click the Preview Changes button in Elementor to see how your page looks on the front-end.
- You can toggle between desktop, tablet, and mobile views to ensure your design is responsive.
